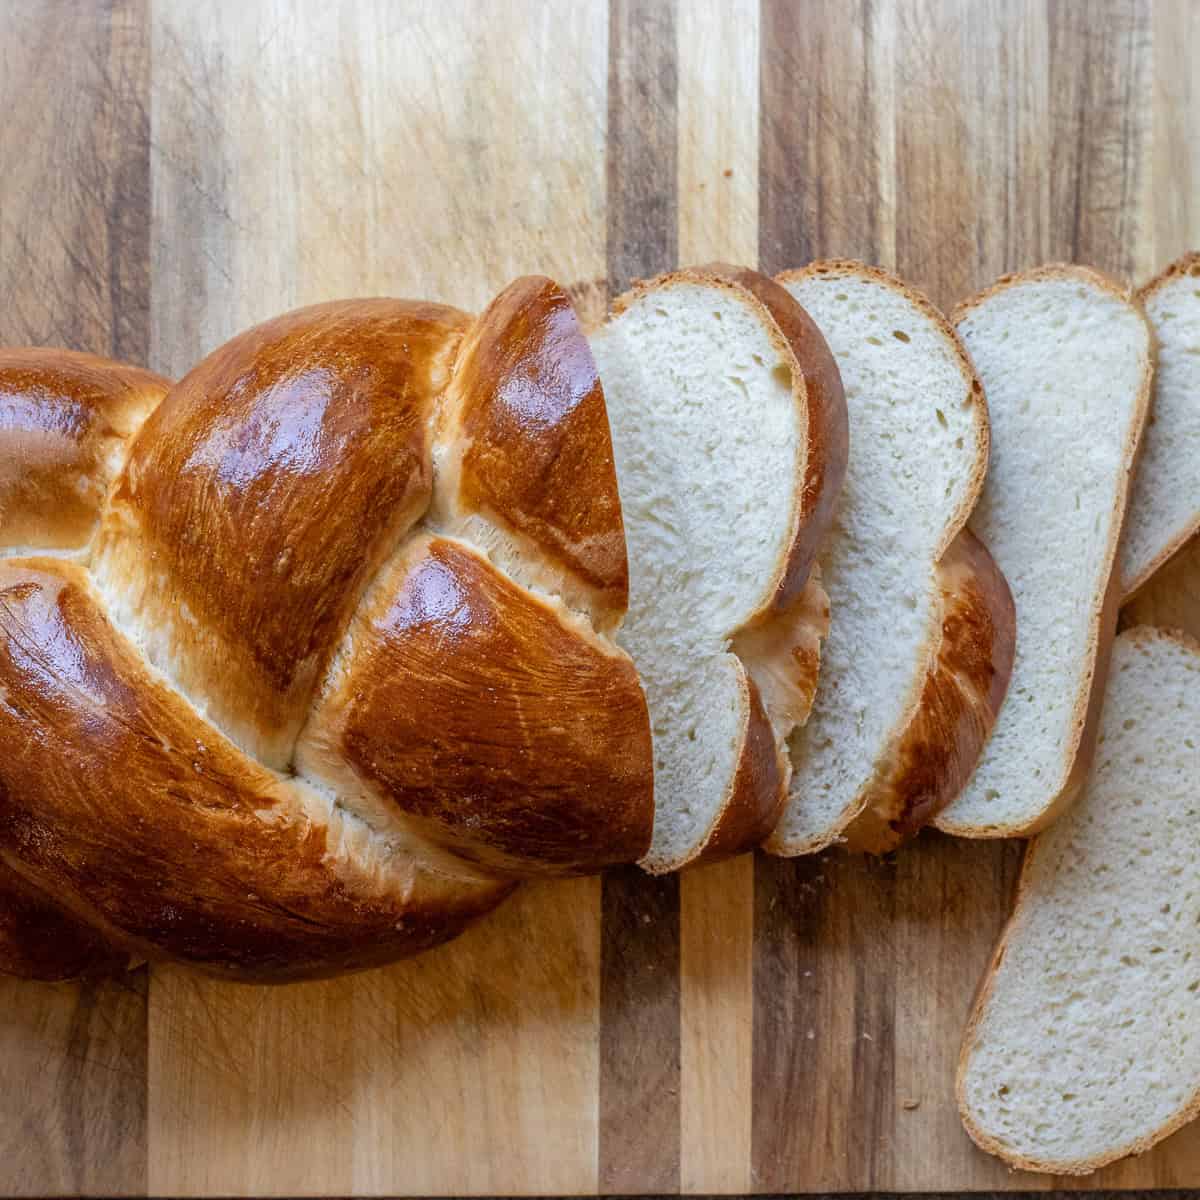
My soft Sourdough Sandwich Bread is light, easy to slice, and made with a sourdough starter instead of yeast. The flavour is mild, not overly sour, which makes it a good everyday loaf.
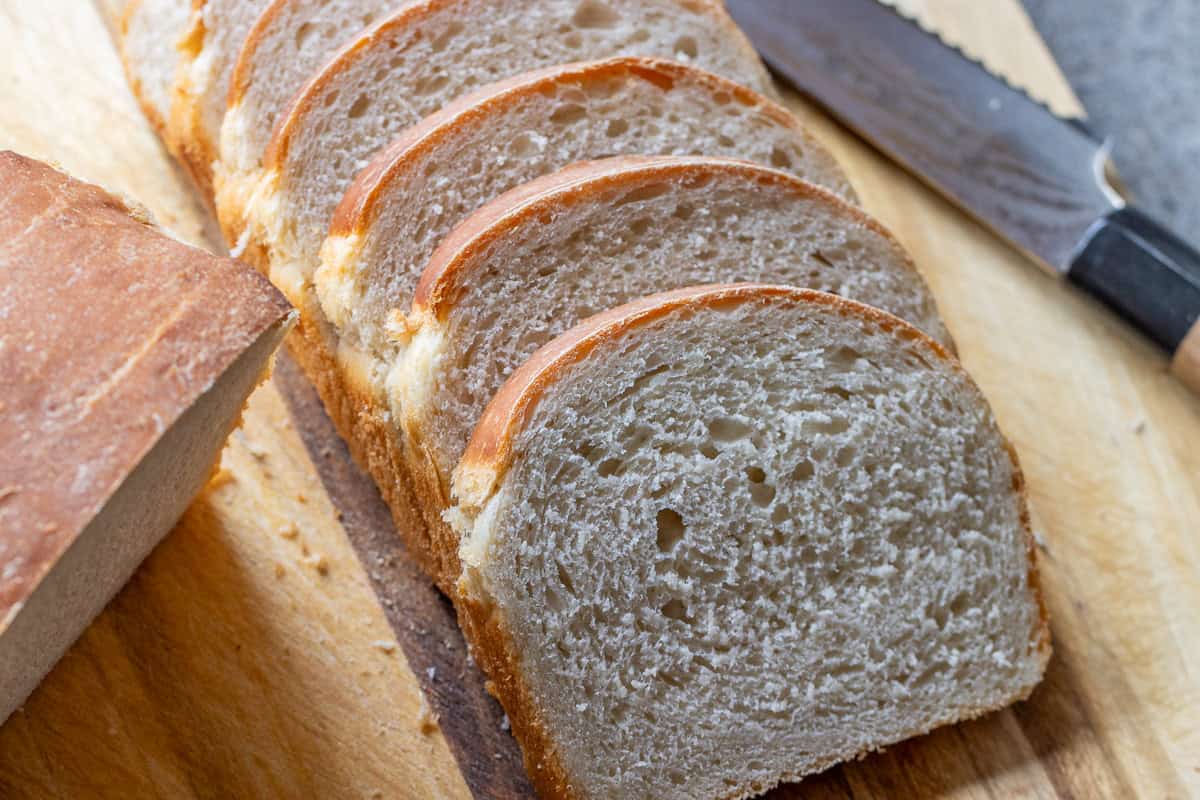
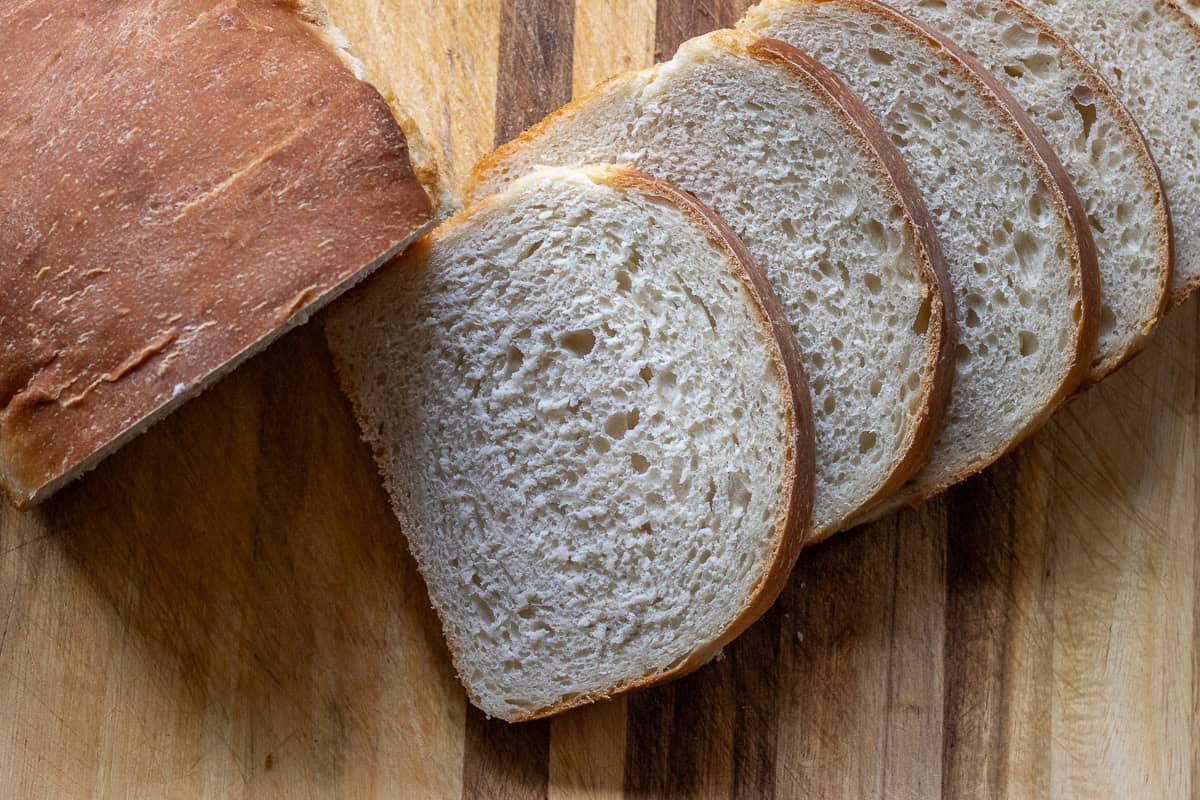
It keeps the soft texture of a classic Homemade Sandwich Bread while adding a bit more depth from the sourdough. It is perfect for everything: sandwiches, toast, or dipping into Turkish Tarhana Soup.
Jump to:
Why This Recipe Works?
- It is softer and less chewy than traditional sourdough, making it better for sandwiches
- It has a subtle, gentle tang that is less intense than classic sourdough bread.
- Enriched dough improves texture and helps it stay soft longer.
- Shaped and baked in a loaf tin for even slices.
Ingredients You'll Need
Please scroll down to the recipe card below for the full ingredients list with measurements, complete recipe method, recipe notes, and nutritional information.
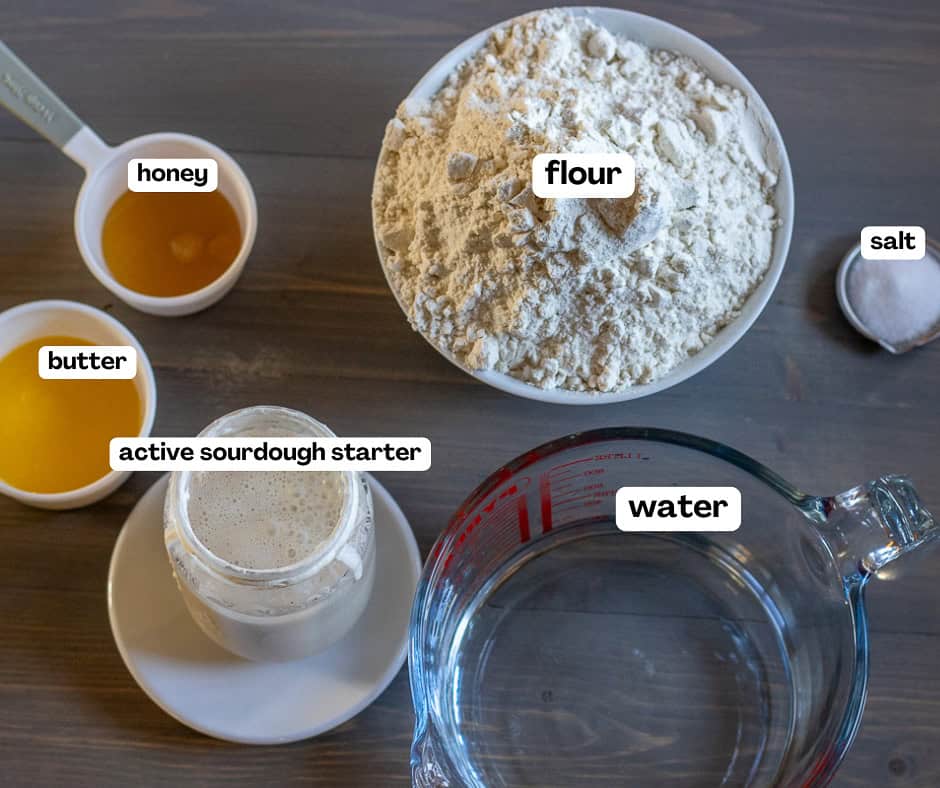
- Active Sourdough Starter - A bubbly starter gives the bread lift and a mild tang.
- All-Purpose Flour - Keeps the crumb softer. Bread flour can also be used.
- Butter - Adds moisture and softens the texture.
- Honey or Sugar - Balances flavour and supports fermentation (optional).
Key Tips Before You Start
- Your starter should be active and bubbly.
- Don’t rush the rise time.
- Dough should feel soft and slightly tacky, not sticky.
- Use a loaf tin for structure.
How to Make Sourdough Sandwich Loaf
Feed the Sourdough Starter
Make sure your sourdough starter is active and bubbly. Feed it about 6 to 12 hours before you start baking. Mix 1 ½ oz (40 grams) of sourdough starter with 1 ½ oz (40 grams) of water and 1 ½ oz (40 grams) of all-purpose flour (plain flour).
Cover it with a lid or cling film and leave it somewhere warm for 6 to 12 hours, or until you're ready to use it. Look for it to double in size and become bubbly.

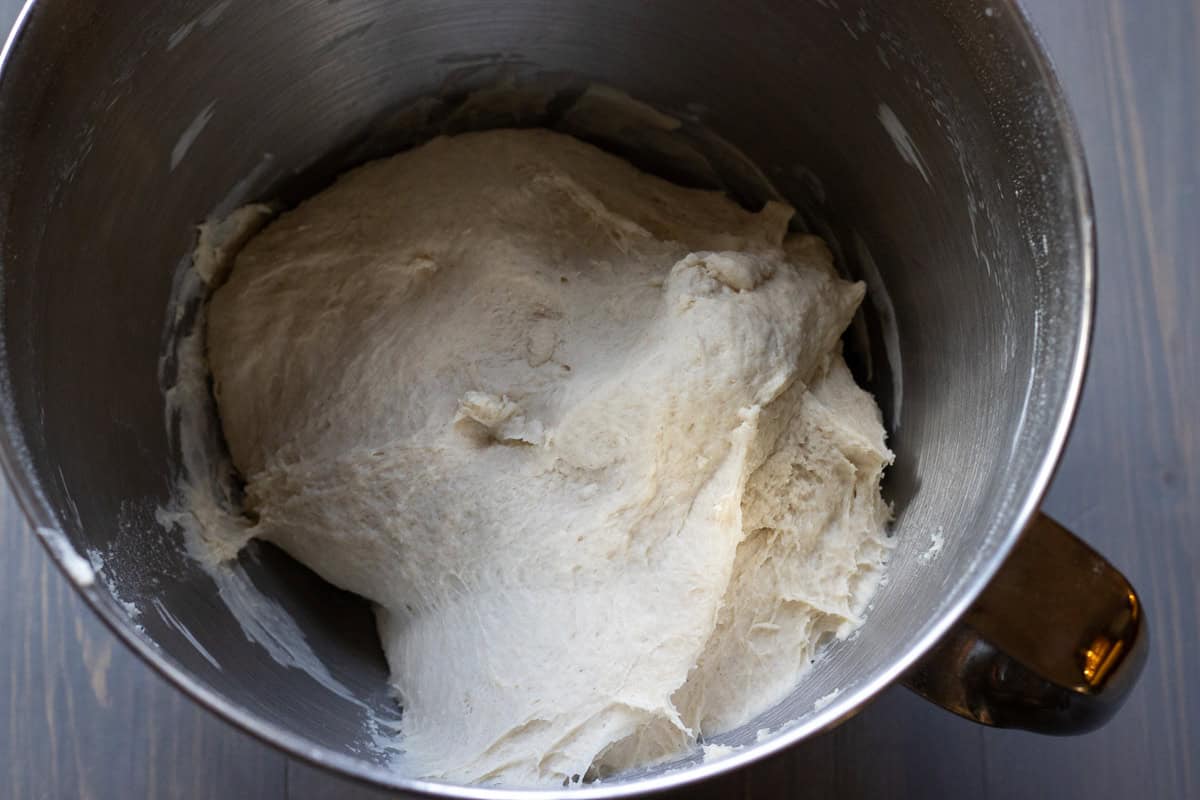
Mix the Dough
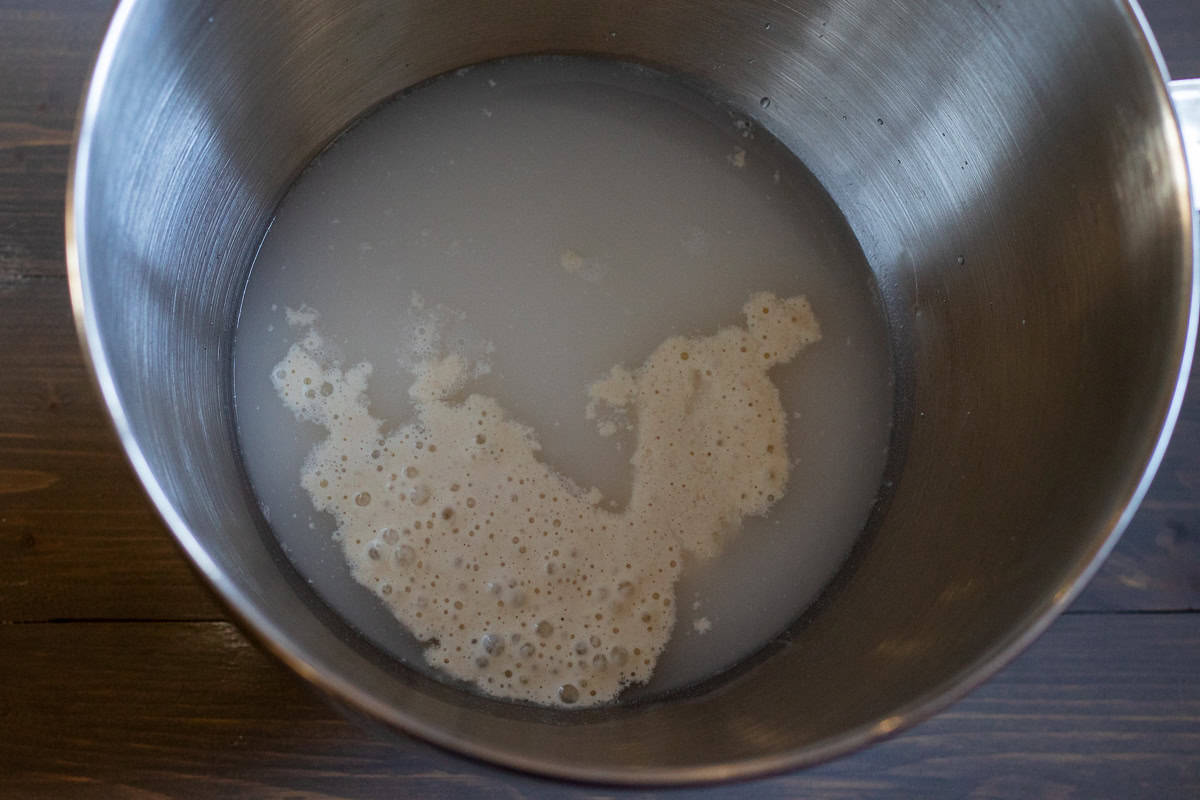
Place the active sourdough starter in a bowl of a stand mixer and add water. Stir until combined.
Add melted butter followed by flour, honey, and salt.

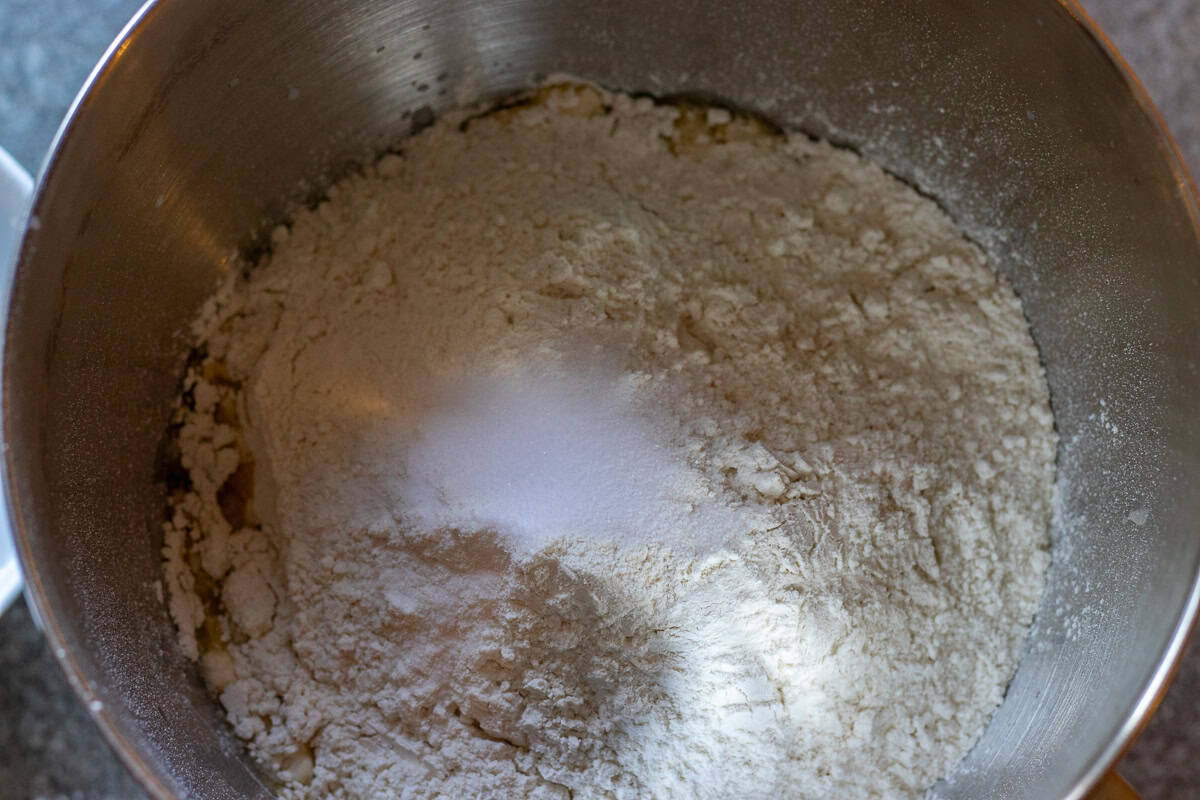
Using a dough hook, mix on medium speed for 8–10 minutes until the dough is smooth and elastic, and pulls away from the bowl.
Bulk Fermentation
Place your dough in a greased bowl, cover it with a damp towel, and let it rise in a warm area. For best results, let it rise for about 4-6 hours, or until it doubles in size.
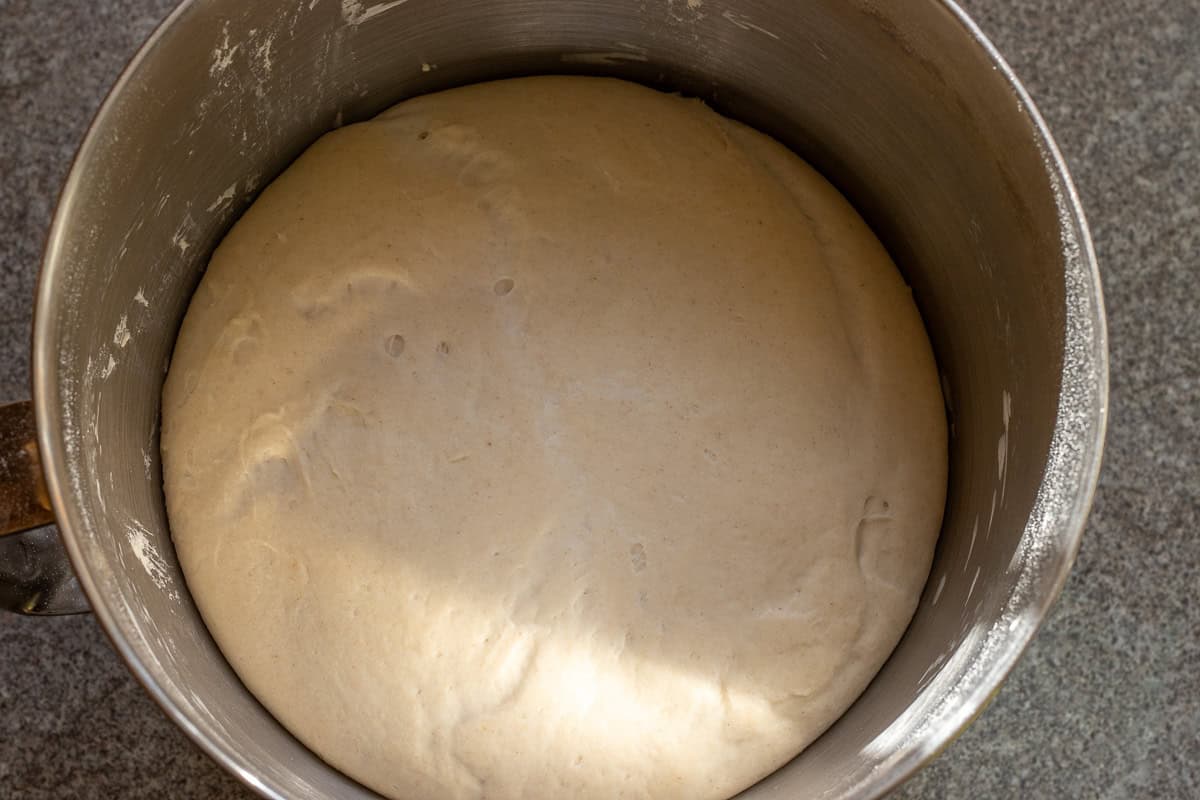
For extra flavor, try a cold fermentation by placing the dough in the fridge overnight. This will slow down the rise and deepen the flavor.
Shape the Dough
After the dough has risen, gently punch it down to remove any large air bubbles. Press the dough with your fingertips to shape it into a rectangle size of 25cm x 35cm (10" x 14").
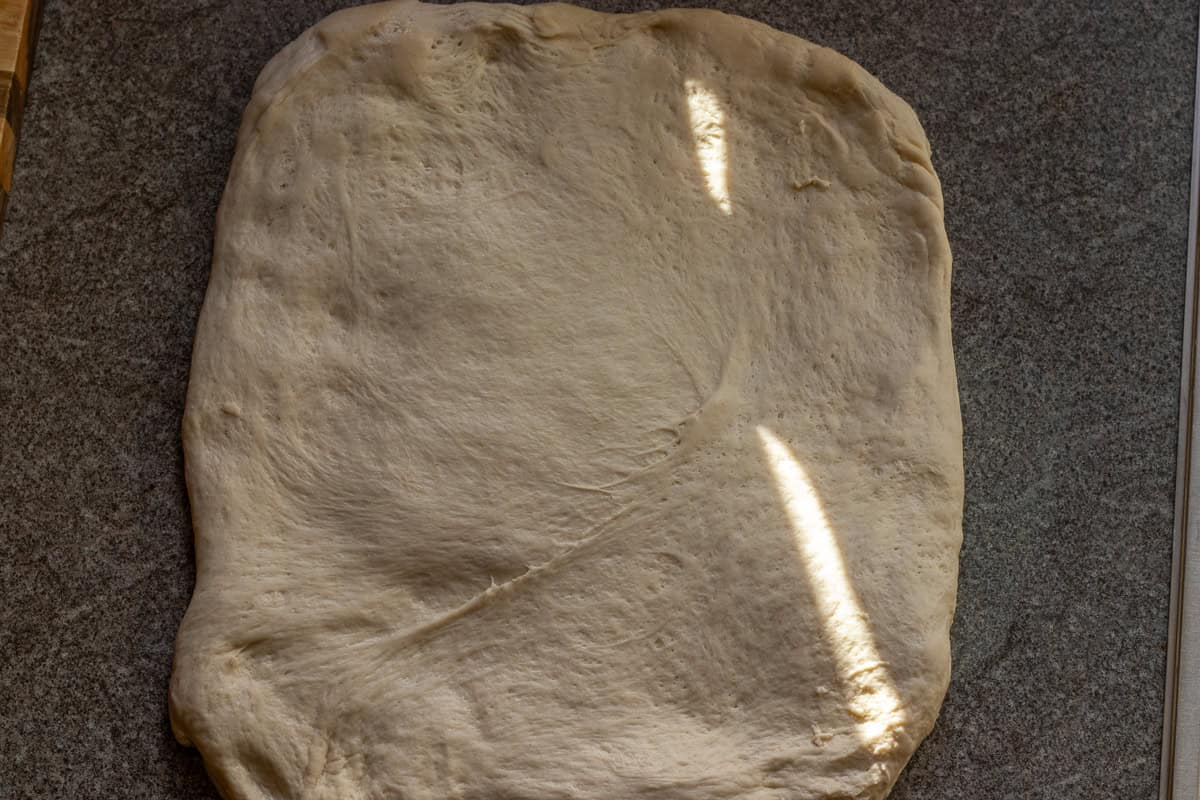
Fold and roll the dough tightly into a log, sealing the edges as you go. You want a snug roll without any gaps.
Second Rise and Baking
Place the shaped dough into a greased loaf pan size of 12 cm x 25 cm (5" x 10").
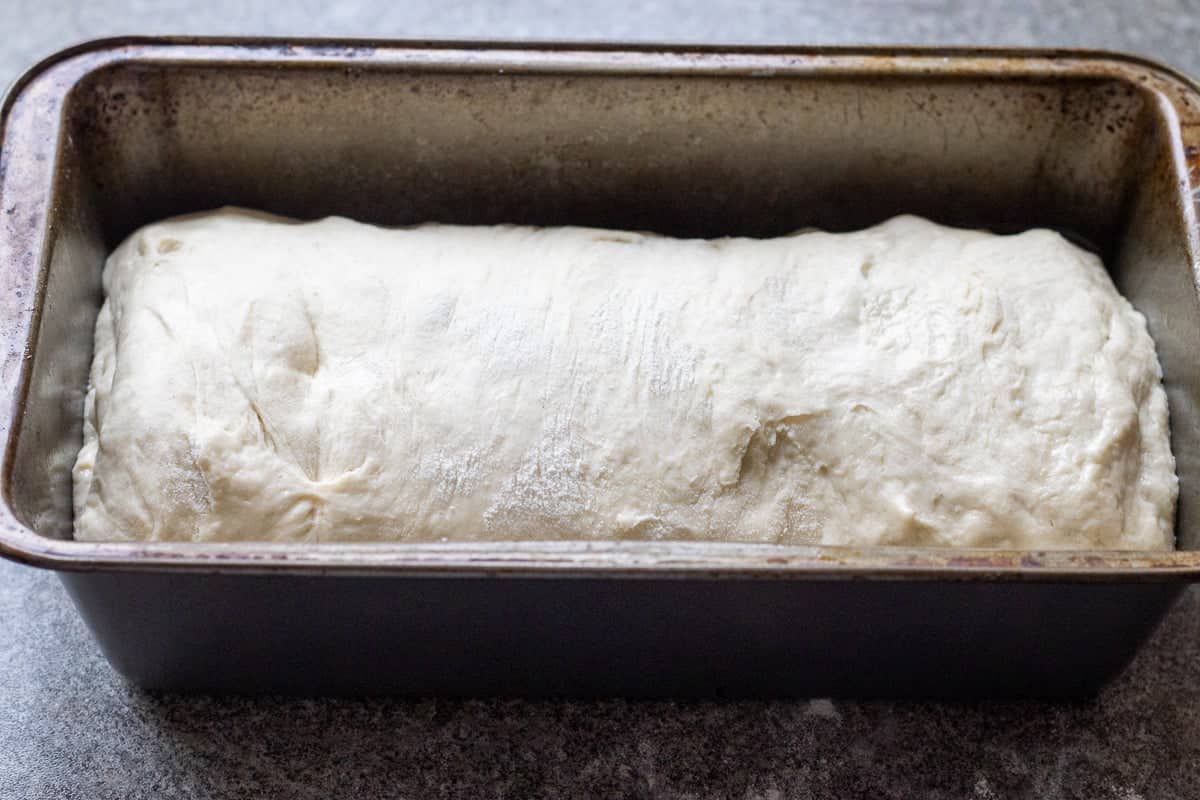
Cover with a damp cloth and let it rise again for about 2-4 hours, or until it reaches just above the rim of the pan.

Set your oven to 430°F (220°C). Place the loaf pan in the center of the oven and bake for about 12 minutes. Reduce the temperature of the oven to 356°F (180°C) and bake for another 12 minutes.
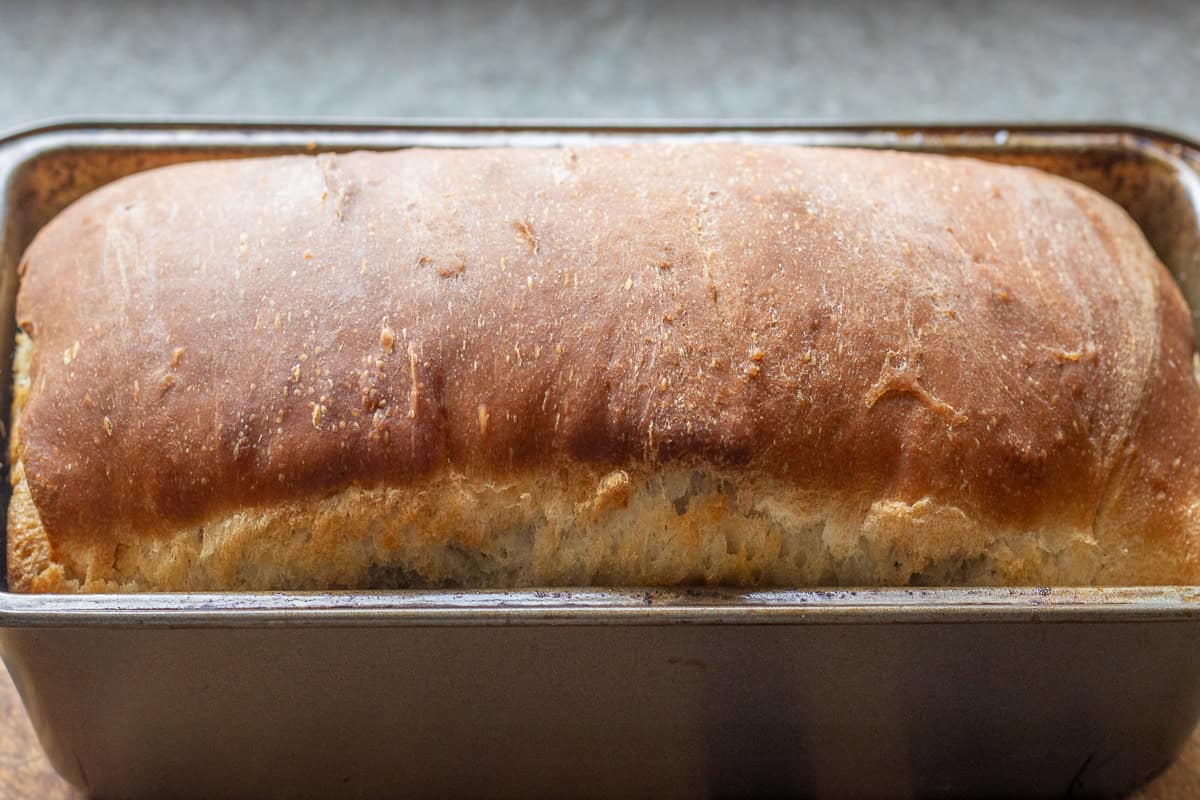
Look for a golden-brown crust, and give the loaf a gentle tap—if it sounds hollow, it’s done. Once baked, let the bread cool in the pan for a few minutes before turning it out onto a wire rack. Cool completely before slicing.
Recipe Tips From the Chef
- Use an active, well-fed starter at its peak.
- Measure ingredients with a digital scale.
- Let the bread cool completely before slicing to prevent it from becoming gummy.
- For more flavour, refrigerate the dough overnight.
Troubleshooting Common Issues
Dough Not Rising
- Is your sourdough starter active? If not, it may not be strong enough to lift the dough.
- The dough rises best in a warm environment. If your kitchen is chilly, try placing the dough in a turned-off oven with just the light on.
Bread is Too Dense
- Under-proofing is the most common cause of dense bread.
- Make sure the dough has fully risen before baking.
Crust is Too Hard
- If the crust is browning too quickly, cover the top with foil for the last 10-15 minutes of baking.
- For a softer crust, brush the top with melted butter after baking.
Serving Ideas
- You can dip your sourdough sandwich bread into a warm bowl of soup, such as Wild Garlic Soup, Greek Lemon Chicken Soup, and Chinese Hot and Sour Chicken Soup, or stews, such as Bamya - Turkish Okra Stew, Youvetsi - Greek Beef and Orzo Stew, and Tas Kebabi - Turkish Beef Stew
- Whether it’s PB&J, turkey, and cheese, or grilled cheese, this bread’s soft texture is ideal for sandwiches.
- Toast slices and add your favorite toppings. Try avocado, Turkish Scrambled Eggs - Menemen, Turkish Kaymak (Geymar), or a generous spread of Rhubarb Jam.
- This soft sourdough bread for sandwiches also makes amazing French toast.
- Sometimes, simple is best! Slice the bread, spread a bit of butter, and sprinkle a little sea salt for a classic snack.
Storing and Freezing Tips
Freezing: For longer storage, slice your loaf and place it in a zip-top bag. You can keep them in the freezer for up to 3 months.
Room Temperature: Store in an airtight container for up to 3 days at room temperature.
Recipe FAQs
Your starter is ready when it’s bubbly, and active, and has roughly doubled in size after feeding. It should also have a mild, tangy aroma and pass the “float test”—a small spoonful of starter should float in water if it’s at its peak.
Yes, you can knead the dough by hand, though it may take a little longer. Knead for 10–15 minutes, until the dough is smooth and elastic. Resting the dough periodically during hand-kneading helps make the process easier.
Sourdough bread is usually made with just flour, water, salt, and starter. It has a chewy texture, a more open crumb, and a thicker crust.
Sourdough sandwich bread is softer and more uniform. It often includes ingredients like butter, milk, or oil, which create a finer crumb and softer crust. It’s baked in a loaf tin, so it holds its shape and slices evenly.
The flavour is also milder, making it more suitable for everyday use.
Related Recipes
For more delicious sourdough bread recipes why not try:


Did you make this recipe? Please let me know how it turned out! Leave a comment below and tag @cookingorgeous on Instagram and hashtag it #cookingorgeous.
I hope you enjoy the process of making this soft and fluffy Sourdough Sandwich Bread as much as you enjoy eating it! 🙂
Want to Save This Recipe?
Enter your email & I'll send it to your inbox. Plus, get great new recipes from me every week!
By submitting this form, you consent to receive emails from Cooking Gorgeous

Soft Sourdough Sandwich Bread
Ingredients
- 4 oz active sourdough starter (110 grams)
- 1 ¼ cups water (300 ml)
- 2 tablespoon unsalted butter (melted) (30 grams)
- 5 cups plain white flour / all purpose flour (600 grams/21 oz)
- 1 tablespoon honey
- 1 ½ teaspoon salt
Instructions
Feeding the Sourdough Starter
- Make sure your sourdough starter is active and bubbly. Feed it about 6 to 12 hours before you start baking. Mix 1 ½ oz (40 grams) of sourdough starter with 1 ½ oz (40 grams) of water and 1 ½ oz (40 grams) of all-purpose flour (plain flour).
- Cover it with a lid or cling film and leave it somewhere warm for 6 to 12 hours, or until you're ready to use it.
- Look for it to double in size, with bubbles that indicate it’s ready to work its magic.
Mixing the Dough
- Place the active sourdough starter in a bowl of a stand mixer and add water. Stir until combined.
- Add melted butter followed by flour, honey, and salt.
- Using a dough hook, mix on medium speed for 8–10 minutes until the dough is smooth, elastic, and pulls away from the bowl.
Bulk Fermentation
- Place your dough in a greased bowl, cover it with a damp towel, and let it rise in a warm area. For best results, let it rise for about 4-6 hours, or until it doubles in size.
- For extra flavor, try a cold fermentation by placing the dough in the fridge overnight. This will slow down the rise and deepen the flavor.
Shaping the Dough
- After the dough has risen, gently punch it down to remove any large air bubbles.
- Gently press the dough with your fingertips to shape it into a rectangle size of 25cm x 35cm (10" x 14").
- Fold and roll the dough tightly into a log, sealing the edges as you go.
- If you’re not sure how to shape, think of it as rolling up a yoga mat! You want a snug roll without any gaps.
Second Rise and Baking
- Place the shaped dough into a greased loaf pan size of 12 cm x 25 cm (5" x 10").
- Cover with a damp cloth and let it rise again for about 2-4 hours, or until it reaches just above the rim of the pan.
- Set your oven to 430°F (220°C).
- Place the loaf pan in the center of the oven and bake for about 12 minutes.
- Reduce the temperature of the oven to 356°F (180°C) and bake for another 12 minutes.
- Look for a golden-brown crust, and give the loaf a gentle tap—if it sounds hollow, it’s done.
- Once baked, let the bread cool in the pan for a few minutes before turning it out onto a wire rack. Cool completely before slicing.
Video
Notes
- Ensure your sourdough starter is active, well-fed, and bubbly, with plenty of strength at its peak.
- Use a digital kitchen scale to measure your ingredients as precisely and accurately as possible.
- Let the bread cool completely before slicing to prevent it from becoming gummy.
- For extra flavor, try a cold fermentation by placing the dough in the fridge overnight. This will slow down the rise and deepen the flavor.
- If you’re not sure how to shape, think of it as rolling up a yoga mat! You want a snug roll without any gaps.
- For longer storage, slice your loaf and place it in a zip-top bag. You can keep them in the freezer for up to 3 months.


Ella Davis says
I tried this recipe as soon as it arrived in my inbox, and it turned out perfect! I’ll definitely be making a double batch next time, as this one disappeared fast!